JBoss-IDE plugin
for Eclipse
During the update of this
description to reflect the latest release of Eclipse, a bug was
detected in the provided files for JBoss-IDE plugin for Eclipse.
The
downloadable bugfix is not already capable of being installed by the
'Software Updates' functionality of Eclipse.
Therefore a Bugfix
(August 2005) for JBoss-IDE for Eclipse is provided in a
separate
document.
Before using the
following installation-instructions, please 'google' the web if a
Version 1.5 / Milestone 2 or higher is available for the 'Software
Update' of Eclipse !
This
document describes the installation of the JBoss-IDE
plugin for the Eclipse
Modelling
Framework).
The
Jboss-IDE plugin (for Eclipse) is an Integrated Development
Environment (IDE) providing templates and functions to speed up
developments of Java-components for the popular JBoss
Java Application Server.
Credits:
Thanks
to Javid Jamae who made a detailed description of the installation
and examples.
The paper of Javid can be found under
http://www.devx.com/opensource/Article/20242.
There
is also a description for the installation of the plugin under
Eclipse version 2.x (although i recommend an upgrade to version
3.x).
Further you can find a description to add shortcuts to the
top toolbar.
Prerequisites:
Operating-system
installed ;-).
Logged
on as user, who will use Eclipse as an IDE; in our example called
developer01.
Eclipse
3.1
installed, started and ended at least once.
Installation-instructions:
Contrary
to other installations (where a set of files had to be downloaded and
then installed), the newest plugin is downloaded and installed with a
function from within Eclipse.
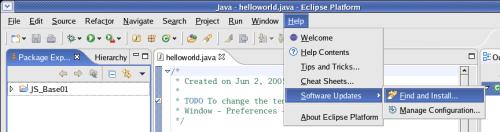
Define
	the site with the update; select
	>Help>Software
	Updates>Find and Install...
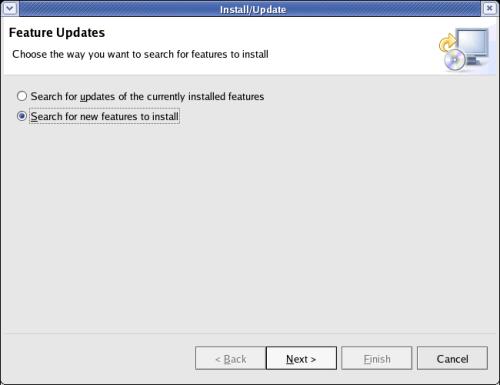
On
	the next screen select 'Search
	for new features to install' and click the [Next]
	button.
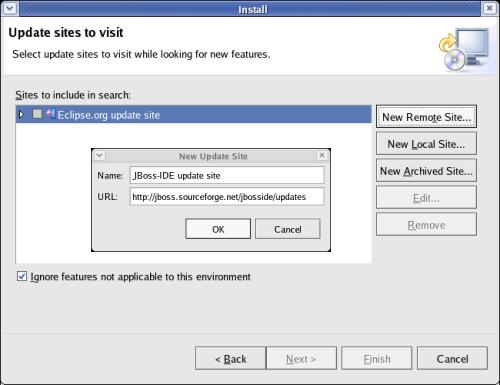
On
	the next screen click the [New
	Remote Site...] button.
Enter a name of
	your choice (e.g. JBoss-IDE
	update site) in the 'Name' field
and the URL
	http://jboss.sourceforge.net/jbosside/updates
	in the 'URL' field.
Click the
	[  OK  ]
	button.
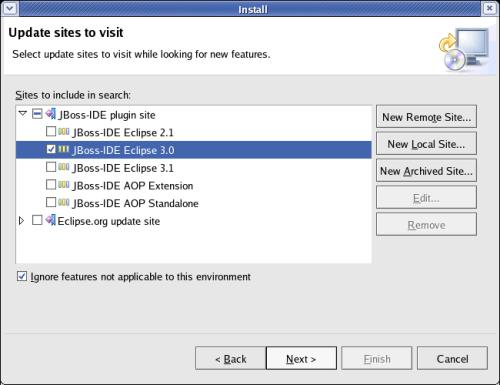
Expand
	the 'Jboss-IDE plugin site'
	and mark 'Jboss-IDE
	Eclipse 3.0'.
Click the [ Next
	>] button.
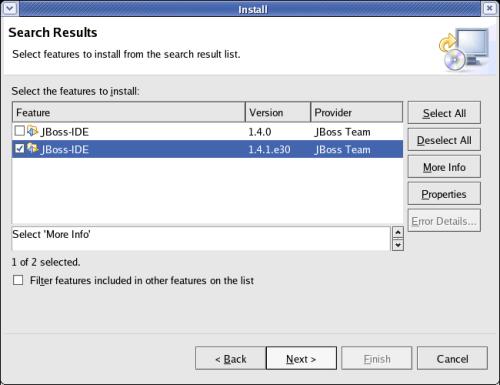
Mark
	the version and click the [ Next
	>] button.
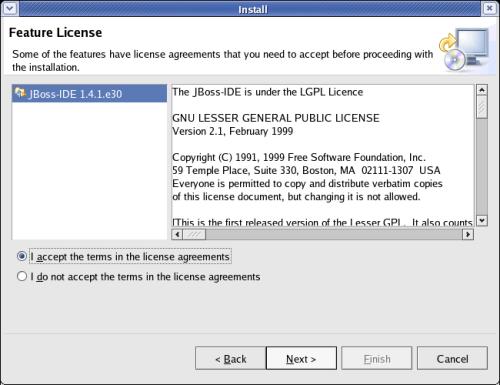
Select
	'I accept the terms in the
	license agreement' and click the [ Next
	>] to take another hurdle.
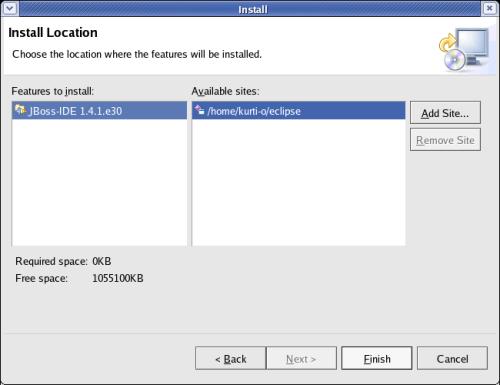
Take
	cognizance of the information on the next window and click the
	[ Finish
	>] to start the installation.
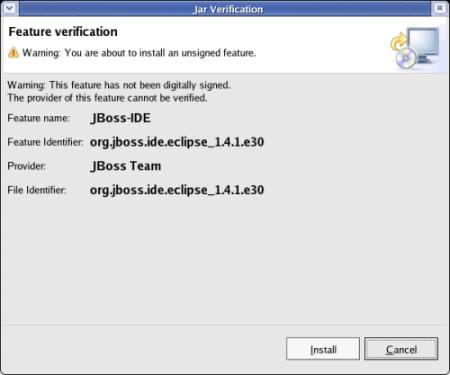
As
	the plugin is not signed, you get an information, click the
	[ Install ]
	as there is no other way to get the plugin installed.
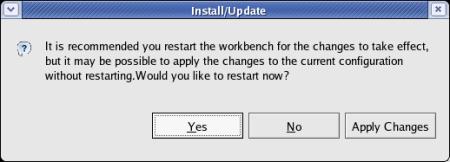
After
	the download is finished, a recommendation to restart the
	Eclipse-workbench is displayed. Agree by clicking the [ Yes ]
	button.
top.
Test:
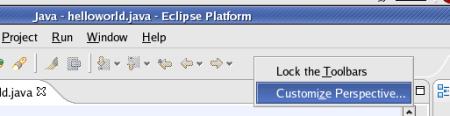
To
check if the functions are available can be don in the following way:
Position
	the cursor on the top toolbar and right-click with the mouse.
Select
	Customize
	Perspective .
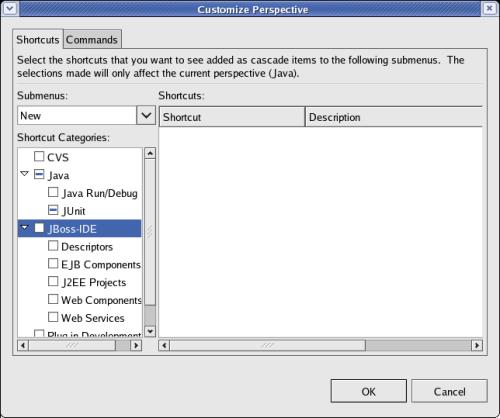
If
	the plugin was installed, 'Jboss-IDE' is one of the 'Shortcut
	Categories'.
If you do not want to add Shortcuts to the
	top-toolbar, click the [ Cancel ]
	button.
If
	you are familiar with adding Shortcuts to the top-toolbar you can
	customize Eclipse according to your favours.
top.