Create the
database-table 'Project' and establish the connection -
Fat-Client-Development
This
step is a little bit away from pure Java-development.
Nevertheless
it is neccessary to perform this 'infrastrutural' job to
* create
a database,
* create a database-table (or all of them if the
database-design is finished),
* assigning at least one user to the
database, specify a password and granting access rights.
Furthermore,
this step introduces a file containing a XML-structure with the
parameters for connecting to the established database and the methods
to read the file with the XML-structure.
This document also
touches the base-class that manages connections to a database and
discusses the advantages of the 'ConnectionManager' class.
Shortcut:
This
document covers the following steps:
* Create
database (js_tutorial) and grant access rights,
* Log
on to the just created database and create the database-table
'Project',
* Alternative
ways to create the database-table,
* Define
the XML-structure with the parameters for
database-access,
* Construct
the ConnectionManager and verify if the connection was successful
Preface:
The
guidance mainly assumes that a MySQL
database is used – the referenced document (Set
up the MySQL database for access by JAVA-applications) shows the
procedure for the MySQL-database.
Database-systems from other
vendors will need other procedures to create a database and
database-tables – for sure !
All
of the code used to connect to a database is already covered with the
base-classes.
This document shows
* the layout of the
XML-structure with the parameters for database-connection,
* what
methods of the base-classes have to be called to establish a
connection to the database and
* how the verification .
Credits:
Too
numerous to mention; the idea is available in dozens of versions –
I refined a lot of ideas into my system.
Prerequisites:
This
step can be done independant from coding Data-Base-Access (DBA)
Objects;
at least JS_FC01f
- Base-Class for reading a file with XML-structure
has
to be completed (and its
prerequisites too) as the class to read the file with the
XML-structure with parameters for the connection to the database
relies on the base-class for reading XML-structure developed there.
A
database-system has to be installed.
If you want to use MySQL
(free of charge), please refer to Linux**
- Databases | MySQL; for other vendors please consult their
documentation.
Create
database and grant access rights:
The
parameters shown in the examples are highly dependant from the
individual settings of the database-system.
As it might be very
rare, that your system has exactly the same setting as mine (were I
took the examples from), please be extreme careful when you adapt the
commands shown in this tutorial.
This
chapter is a condensed version of the guideline in Set
up the MySQL database for access by JAVA-applications.
If you
skipped the tutorial Base
lesson 2: DataBase-Loader with a GUI, I recommend that you browse
through the documents Base
lseeon 2, step3: Read parameters for the connection to the database,
Base lesson 2, step 4:
Connect to the database and Base
lesson 2, step 5: Run SQL-commands against the database to get an
idea how data is stored and retrieved from a database.
If
you are using the standard installation of the MySQL database-system:

for security reasons, the creation of a database and the setting
of access-rights can only be done on the machine where the
database-system is running
Open
	a 'Terminal' window on the machine where the database-system is
	running and
log on to the database-system as administrator (user
	'root'):
mysql
	–-user=root mysql
The
	MySQL command-interface opens and the MySQL-database-system is ready
	to accept SQL-commands.
mysql>
Issue
	the SQL-command to create the database:
mysql> CREATE
	DATABASE js_tutorial;

If you
	already created the database in a previous tutorial, you will get
	the following error-message:
ERROR
	1007 (HY000): Can't create database 'js_tutorial'; database
	exists
mysql>

If
	the database did not already exist, you will get the following
	confirmation:
Query OK, 1 row affected (0.01
	sec)

mysql>
Issue
	the SQL-command to grant access rights for the just created database
	to a business user ('mysql') and set a password
	('drowssap)':
mysql> GRANT
	ALL ON js_tutorial.* TO 'mysql' IDENTIFIED BY 'drowssap';

The
	database-system confirms:
Query OK, 1 row affected
	(0.05 sec)

mysql>
Task
	that have to be done with administrator rights are now completed;
	quit the user-interface of the database-system:
mysql> quit
Bye
top.
Log
on to the just created database and create the database-table
'Project'
For
security reasons, MySQL does not allow the administrator ('root') to
work with databases.
Therefore, queries and administration work
(defining database-tables) must be done with a user that has grants
to manipulate databases.
The GRANTs were given to the user 'mysql'
in the previous step.
The
parameters shown in the examples are highly dependant from the
individual settings of the database-system.
As it might be very
rare, that your system has exactly the same setting as mine (were I
took the examples from), please be extreme careful when you adapt the
commands shown in this tutorial.
Issue
	the commands to create the database-table and define the
	attributes:
mysql>
	CREATE
	TABLE Project (DataSetID DOUBLE NOT NULL PRIMARY KEY);

The
	database-system confirms:
Query OK, 1 row affected (0.03
	sec)

mysql>
You
	can do this for each SQL-Command, e.g:
mysql>
	ALTER
	TABLE Project ADD COLUMN ObjectID DOUBLE
	NOT NULL DEFAULT 0;

or
type
	all SQL-commands into a text-file and use one of the alternative
	ways described in the next paragraph.
top.
Alternative
ways to create the database-table
Keying
in each SQL-command is pretty boring particularly if the
table-definition becomes a little bit more voluminous.

So there are two alternative methods to create a
database-table.
Both of them use a text-file with the
SQL-commands.
The
folder and the name of the file can be chosen freely; I decided for
folder 'DB_SCRIPTS' with file 'Create_Tables.txt' under the
Eclipse-project JS_FC01
To
create the folder, right click onto the
project
'JS_FC01' and select >New>Folder
Enter
the Folder name (DB_SCRIPTS),
and click the [ Finish ] button.
To
	create a new file under the folder, right click onto the just
	created folder 'DC_SCRIPTS' and
	select >New>File

Enter
	the File name (Create_Tables.txt),

and click the [ Finish ] button.
Eclipse
has already generated an empty file and the SQL-commands can be
entered.
CREATE
TABLE Project (DataSetID DOUBLE NOT NULL PRIMARY KEY);
ALTER
TABLE Project ADD COLUMN ObjectID DOUBLE
NOT NULL
ALTER
TABLE Project ADD COLUMN CreatedBy VARCHAR(254)
NOT
NULL
ALTER
TABLE Project ADD COLUMN CreatedAt TIMESTAMP;
ALTER
TABLE Project ADD COLUMN ChangedBy VARCHAR(254)
NOT
NULL DEFAULT '';
ALTER
TABLE Project ADD COLUMN ChangedAt TIMESTAMP;
ALTER
TABLE Project ADD COLUMN ValidFrom DATE
NOT
NULL DEFAULT
'1999-01-01';
ALTER
TABLE Project ADD COLUMN ValidTill DATE
NOT
NULL DEFAULT
'7999-12-31';
ALTER
TABLE Project ADD COLUMN ProjectCode CHAR(16)
NOT
NULL
ALTER
TABLE Project ADD COLUMN LanguageCode CHAR(04)
NOT
NULL
ALTER
TABLE Project ADD COLUMN TargetDirectory VARCHAR(254)
NOT
NULL DEFAULT '';
,
ValidTill DESC
The
	following description is for a MySQL database-system.
Other
	database-systems offer similar capabilities to execute SQL-commands
	out of a text-file.
If you use another database-system than
	MySQL, please refer to the manual of the used database-system.
Log
	on to the database-system selecting the just created database
	('js_tutorial'):
mysql
	–-host='127.0.0.1 –-user='mysql' –-password='drowssap'
	js_tutorial
Use
	the 'source' command to execute the commands out of a
	text-file.
(Please obey, that the location of the text-file is
	specific for my system and may not be accurate for yours):
mysql>
	source
	/home/kurti-o/js_fat_client/JS_FC01/DB_SCRIPTS/Create_Tables.txt

The
	database-system prints a confirmation (or an error-message) for each
	SQL-command in the text-file:
Query OK, 0 rows affected
	(0.02 sec)

Query
	OK, 0 rows affected (0.03 sec)
Records: 0 Duplicates: 0 Warnings:
	0

. . . . . . .
. . . . . . .

Query
	OK, 0 rows affected (0.02 sec)
Records: 0 Duplicates: 0 Warnings:
	0

mysql>
An
	application independant from a database-vendor
was developed
	in the tutorial Base
	lesson 2: A DataBase-Loader with a GUI (Graphic User Interface).
You
	might use this application if the database-system you are using does
	not offer a convenient command-interface or
you want to print out
	the issued SQL-commands and the replies of the database-system.
top.
Define
the XML-structure with the parameters for database-access:
For
some theory about the the structure of the XML-file please refer to
Structure of the
XML-file with the parameters for database and JAS-connection.
The
parameters shown in this examples are highly dependant from the
individual settings of the database-system.
As it might be very
rare, that your system has exactly the same setting as mine (were I
took the examples from), please be extreme careful when you adapt the
commands shown in this tutorial.
First,
the folder and the file for the xml-structure has to be created:
To
create the folder, right click onto the
project
'JS_FC01' and select >New>Folder
Enter the Folder name
(CONNECTIONS),
and click the [ Finish ] button.
To create a
new file under the folder, right click onto the just created folder
'CONNECTIONS' and select
>New>File
Enter
the File name (Connections.xml),
and click the [ Finish ] button.
top.
Construct
the ConnectionManager-class and verify if the connection was
successful:
Before
the class ConnectionManager can be constructed, it has to be defined
in the base-class JSBS_StartFrame.
Add
	the following lines:
public
	class JSBS_StartFrame
	extends
	JFrame
	implements
	ActionListener,
	KeyListener, FocusListener {
/*
 *
	Constants for the Run-Version.
 * StandAlone: Database is
	on the same machine as the application.
 *
	FatClient: Data is on a Java-Application-Server (JAS); multiple
	clients possible.
 *
	MobileClient: Data from the JAS is mirrored t a local databas on a
	mobile-client (notebook);
 *               Data-entry
	can be done on the mobile-client and data is
	synchronized
 *               when
	a connection to the JAS is established again. */
    public
	static final int
	CONST_StandAlone =
	1;
    public
	static final int
	CONST_FatClient =
	2;
    public
	static final int
	CONST_MobileClient =
	3;
/* Variable
	for the run-version to be delivered. */
    public
	int RunVersion;
/*
 * Connection-Manager
	for access to the database.
	*/
    public
	JSBS_DB_ConnectionManager
	structJSBS_DB_ConnectionManager;
/*
 *
	Structure with a variety of parameters;
 * please see
	description for eacht variable at the class of the structure.
	*/
   public
	JSBS_UniversalParameters
	structJSBS_UniversalParameters;
.
	. . . . . . .
. . . . . . . .
The
construction of the class JSBS_DB_ConnectionManager
requieres only a few lines of code in the Start-Frame (CommandCenter,
class
JS_ErrDB_CommandCenter
).
Import
	the JSBS_DB_ConnectionManager
	class:
package
	js_errdb.clientframes;


import
	java.awt.*;

import
	java.awt.event.*;

import
	javax.swing.*;


import
	js_base.connections.JSBS_DB_ConnectionManager;

import
	js_base.frame.*;

import
	js_base.structures.*;

import
	js_base.xml.*;
Then
add the following lines:
private
void initialize_before_frame(String
parmstrLanguageCode) {
/*
Initialize the structure with the set of parameters
*/
=
new
JSBS_UniversalParameters(parmstrLanguageCode);
/*
Initialize the structure with the XML-Element for language dependant
GUI-elements
* (except JButton).
*/
structJSBS_XML_DisplayStrings
= new
JSBS_XML_DisplayStrings(structJSBS_UniversalParameters);
if
(structJSBS_XML_DisplayStrings.StatusCode
!= CONST_OK){
System.out.println("Error
while building 'structJSBS_XML_DisplayStrings';
StatusCode: " +
(new
Integer(structJSBS_XML_DisplayStrings.StatusCode)).toString());
System.exit(structJSBS_XML_DisplayStrings.StatusCode);
}
/*
* Define,
that the configuration of the application is with a local database
(Stand-Alone). */
RunVersion
=
CONST_StandAlone;
/*
* Establish
the connection to the database-system and/or the JAS -
* depending
on the RunVersion. */
if
((RunVersion
==
CONST_StandAloneRunVersion
==
CONST_MobileClient
structJSBS_DB_ConnectionManager
=
new
JSBS_DB_ConnectionManager(structJSBS_UniversalParameters);
/* Verify
if the class was constructed without an error. */
if
(structJSBS_DB_ConnectionManager.StatusCode
!=
JSBS_XML_Constants.CONST_OK)
{
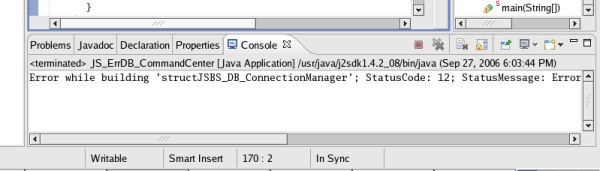
System.out.println("Error
while building 'structJSBS_DB_ConnectionManager';
StatusCode: " +
(new
Integer(structJSBS_DB_ConnectionManager.StatusCode)).toString()
+
";
StatusMessage: " +
structJSBS_DB_ConnectionManager.StatusMsg);
System.exit(structJSBS_DB_ConnectionManager.StatusCode);
}
}
The
implemented code does not lead to any visible result till now.
A
verification that can be done, is to check against absence of errors
when constructing the ConnectionManager.
To
	see the result of the just typed code, run the application again by
	selecting >Run>Run....

Select 'JS_ErrDB_CommandCenter'
	(in the left column under 'Java
	Application') and click the button [ Run ].
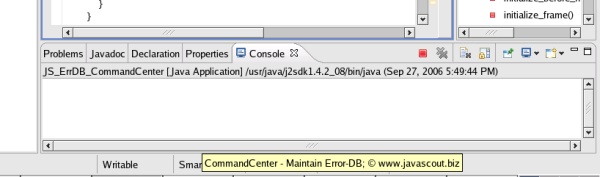
A
	good sign is, if the usual frame appears and the 'Console' section
	stays empty.
A
	sign of an error is, if there is something printed out in the
	'Console' section.
top.
Next
Step: